
You have no items in your shopping cart.
28
Mar
I remember when she BC'd! It was like yesterday. Her hair has grown by leaps and bounds and her roller sets are always gorgeous. I present to you, Mahogany Curls
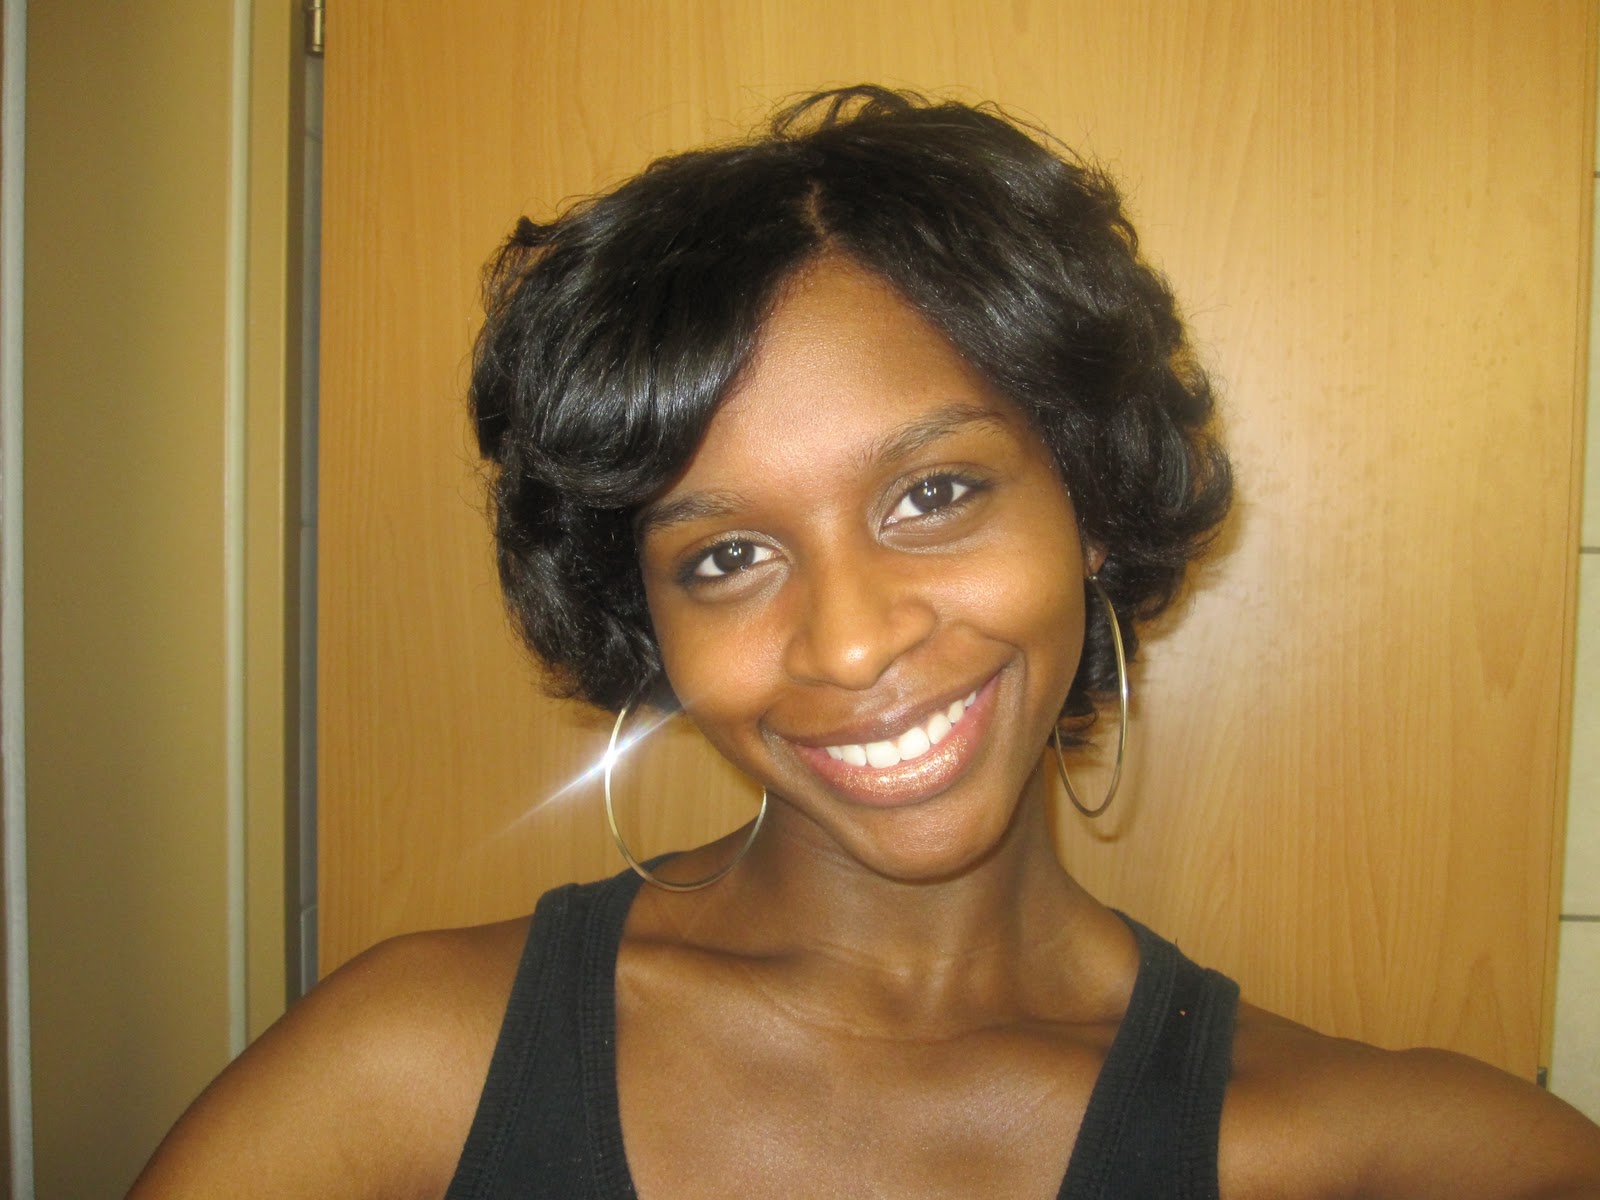
March 2011-2nd Roller Set
Hi Guys!
Sorry about the delay in the posts, I have been busy...y'all know how that goes! Anyway, after seeing CurlyNikki's hair after she did a roller set, it gave me the idea to do another one myself (the hubs also mentioned that he would love to see my hair straight, I cringed at the thought, but he has been a good sport about me wearing my hair curly, lol!). I think her hair turned out beautifully! I loved her results! Make sure you head over to her blog and check it out! Anyway, I decided that I will revisit this style.
August 2010- Flat Ironed/Color Treated Hair
Back in August, I flat ironed my hair and it was nice, but honestly, I didn't like the idea of running a flat iron twice over my hair. I was so nervous about heat damage, even though I didn't get any.
February 2010- First Roller Set
The last time I set my hair was back in February of 2010. I was 12 months post bc wanted to see my length. I loved the results and so did the hubs!
In this post I will explain my steps and give you guys a few tips. I will provide a new updated video in a couple of weeks showing you guys how I actually do this as well! Okay, let's get started!
Difficulty: Medium to Hard depending on experience.
Note: My hair is fairly easy to straighten, I can wear my hair pulled back for a day or so and my roots will get pretty straight. So, I just wanted to let you guys know this prior to explaining what I do. If you look closely, you will see that my hair look as if it is lacking curl pattern. I was wearing a bun for about a week and it stretched my hair a lot! I also went 20 days without doing anything to it! Lol!
Cleansing Your Hair
Before you begin you want to make sure that your hair is clean. Now, last time I set my hair, I actually shampoo'd it with a clarifying shampoo. This time I decided that I would hold off on the poo. I have been following a strict no poo regimen. I know that it may sound gross, but the products I use do not build up on my hair or scalp. I can remove the excess dirt or product through cowashing or water rinsing. I just rinsed my hair and massaged my scalp thoroughly.
Conditioning and Detangling
The next thing I did was condition my hair, I feel that conditioning is a very important step in the styling process. I am a conditioner freak! Lol, I love conditioner. I used Tresemme Naturals as my conditioner of choice. I divided my hair in four sections and applied the conditioner to each section. I used my jilbre shower comb to detangle. Twisted the section that was detangled and started on the next section. When I finished all four sections, I allowed the conditioner to sit for a while before rinsing. After allowing it to sit, I removed each twist finger combed it and rinse the conditioner out with lukewarm water. Once, I rinsed all of the conditioner out, I squeezed the excess water and stepped out of the shower.
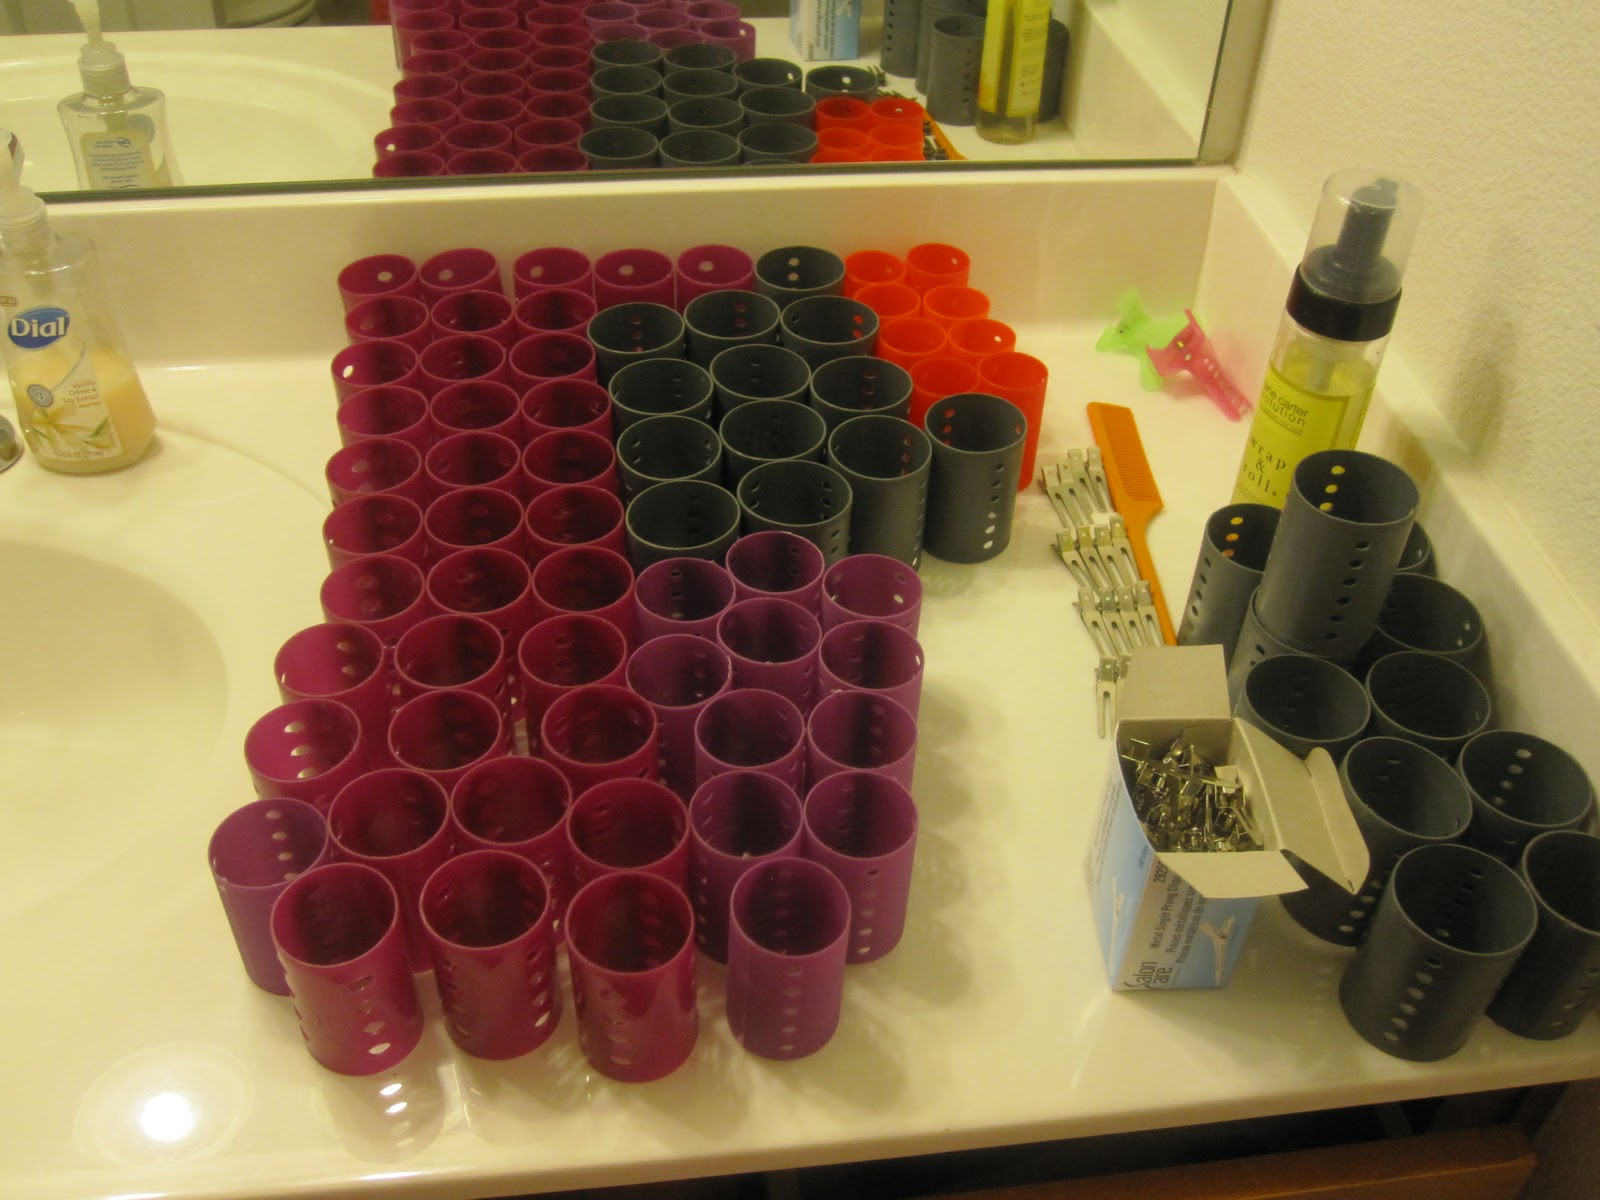
Tools
I didn't use the Jane Carter Wrap and Roll solution this time. Well, I started using it, but it made my hair super hard! So I rinsed it out and decided to go with the treseme naturals. The conditioner made it very easy to section and smooth my hair during the setting process. When my hair was completely dry, my curls were soft, boncy and shiny!
Before you began setting your hair, make sure that you have all of the tools that you will be using, set up, so you can have access to them. Roller setting takes a lot of time, and the process can be very time consuming if you are not prepared. You will need:
- Rollers of your choice (I prefer salon magnetic rollers)
- Duckbill or metal clips
- Rattail comb
- Spray bottle
- Wide tooth comb
- Setting lotion or product of choice
- Hooded dryer (you can also air dry, but it will take a long time to dry)
- Hair clips- I use butterfly clips
- Oil or heat protectant for shine and smoothing
- PATIENCE- most important thing!
The" Mohawk"
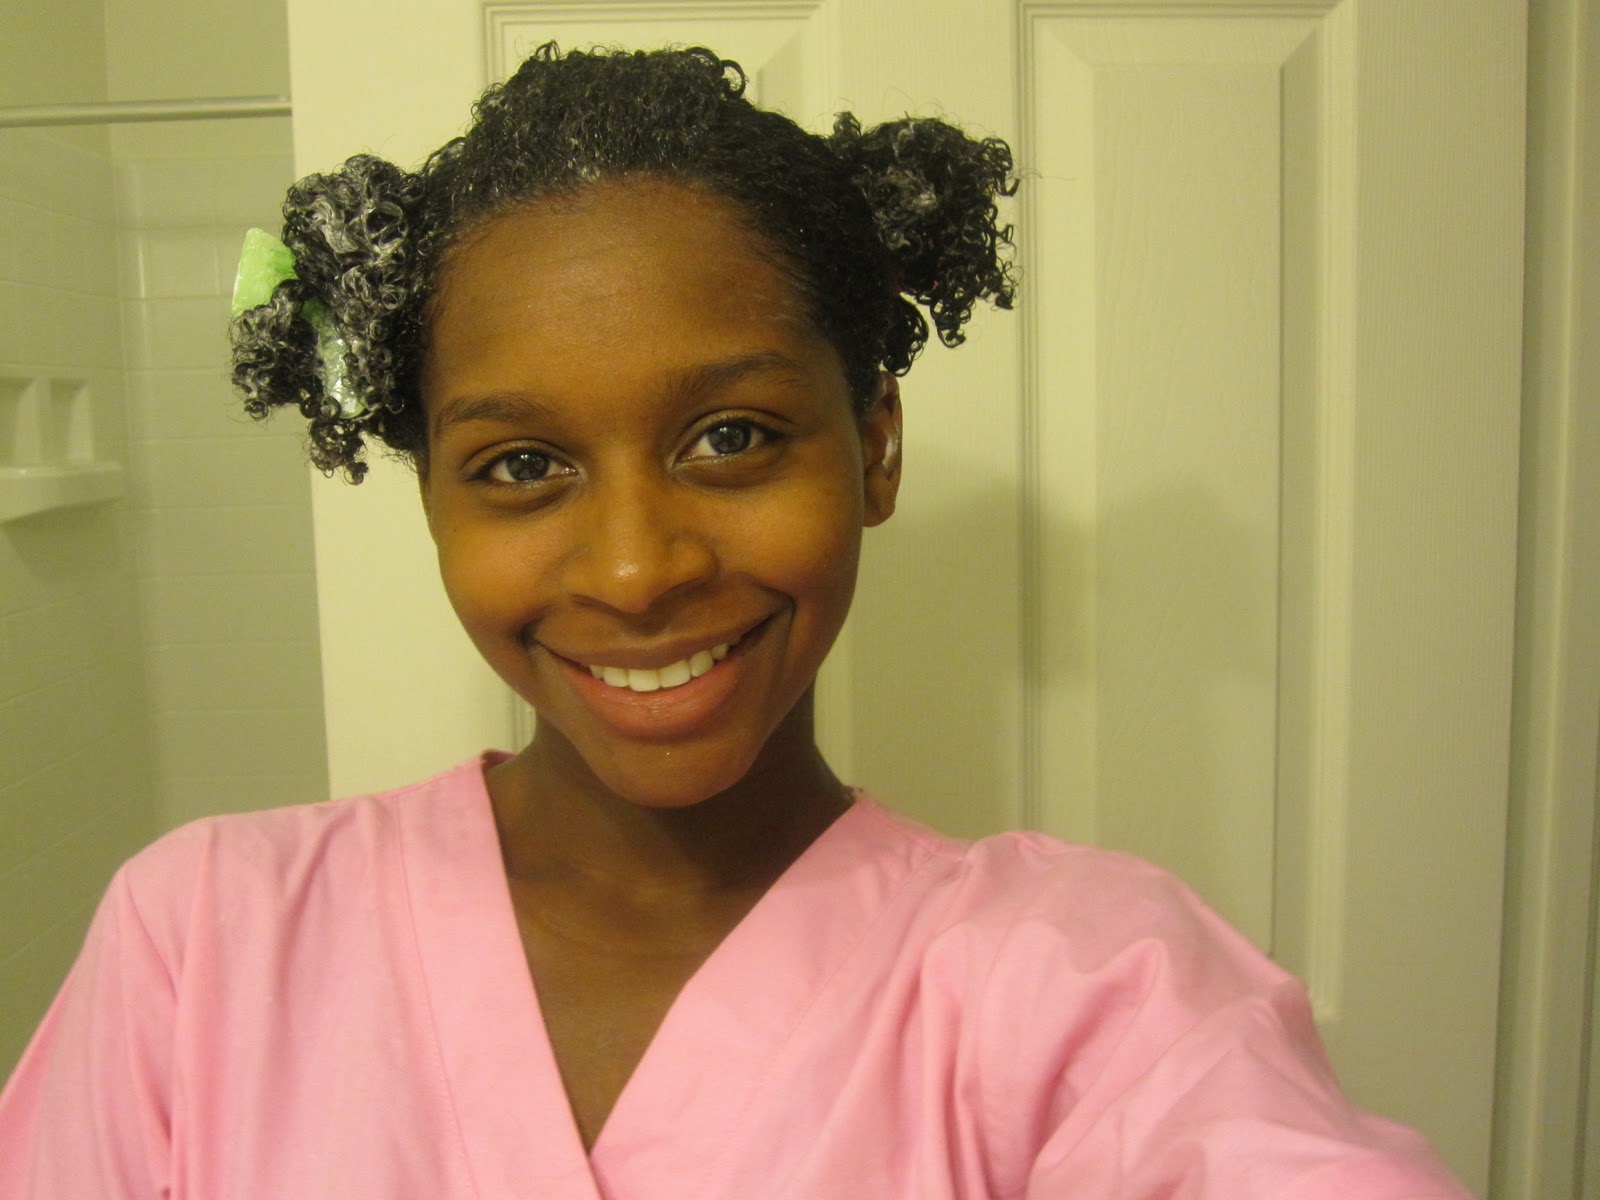
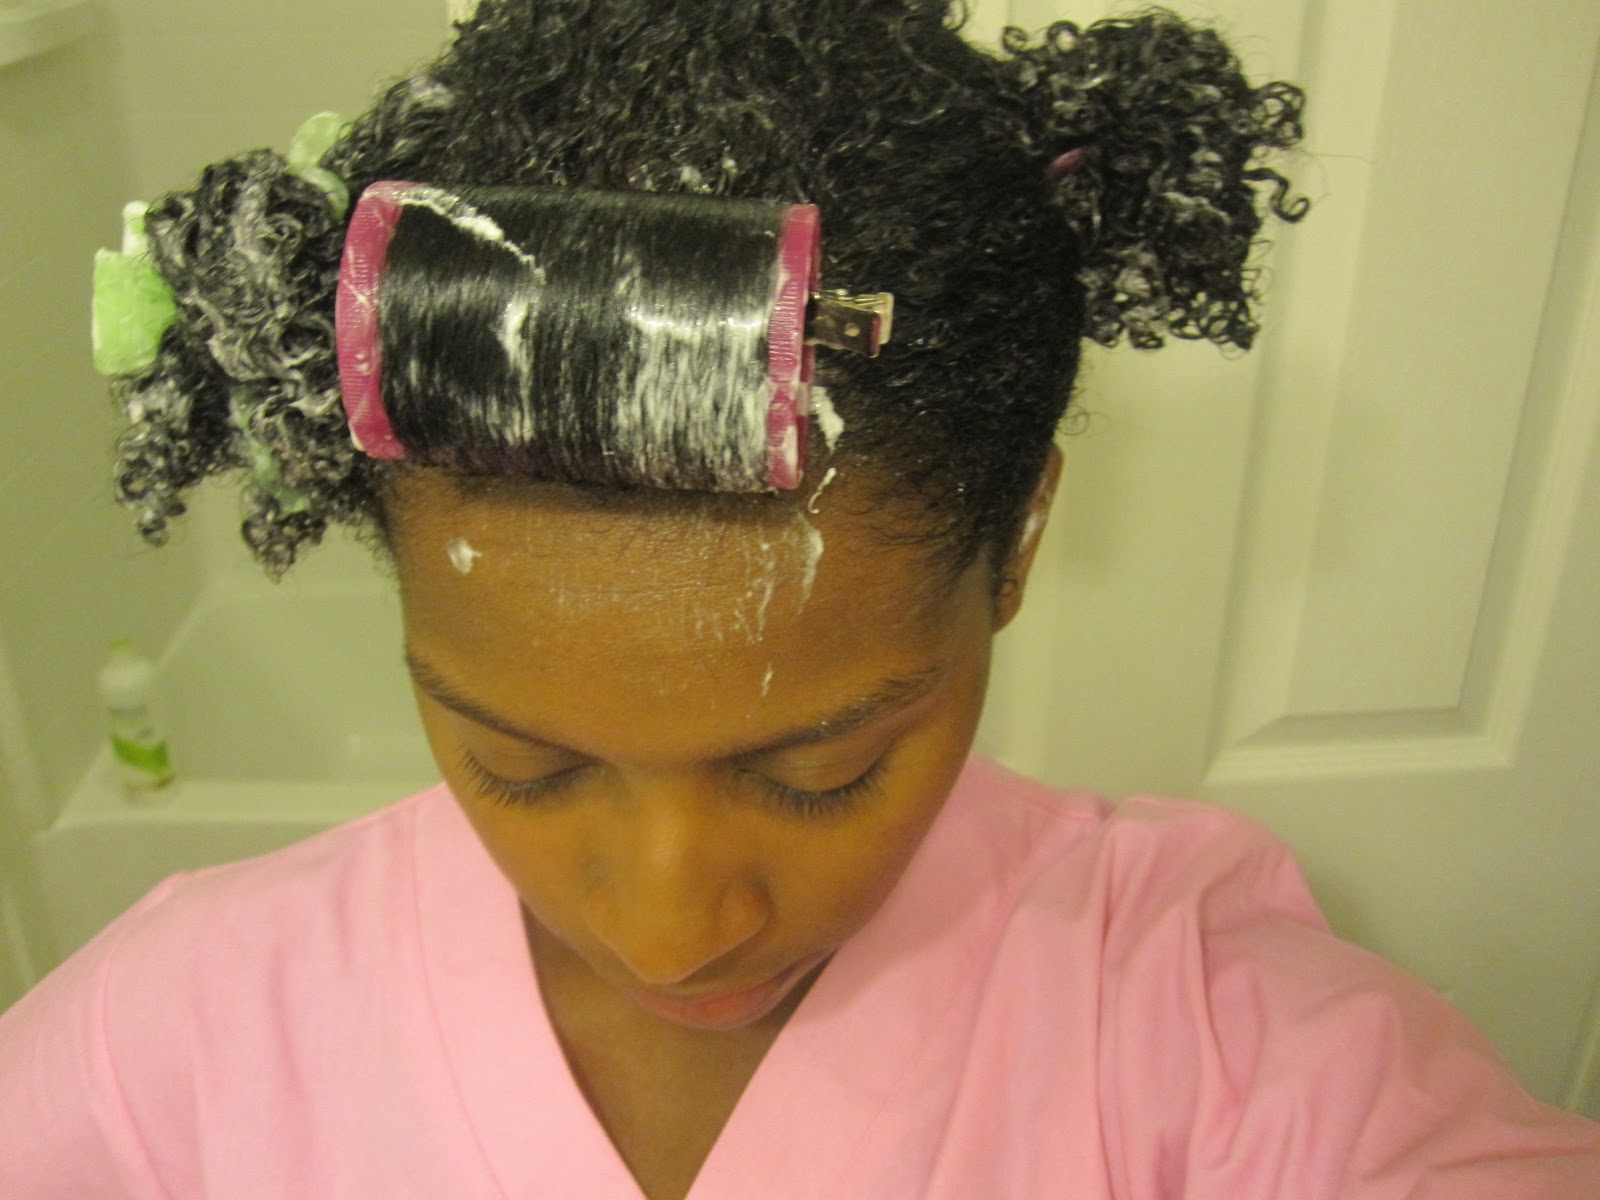
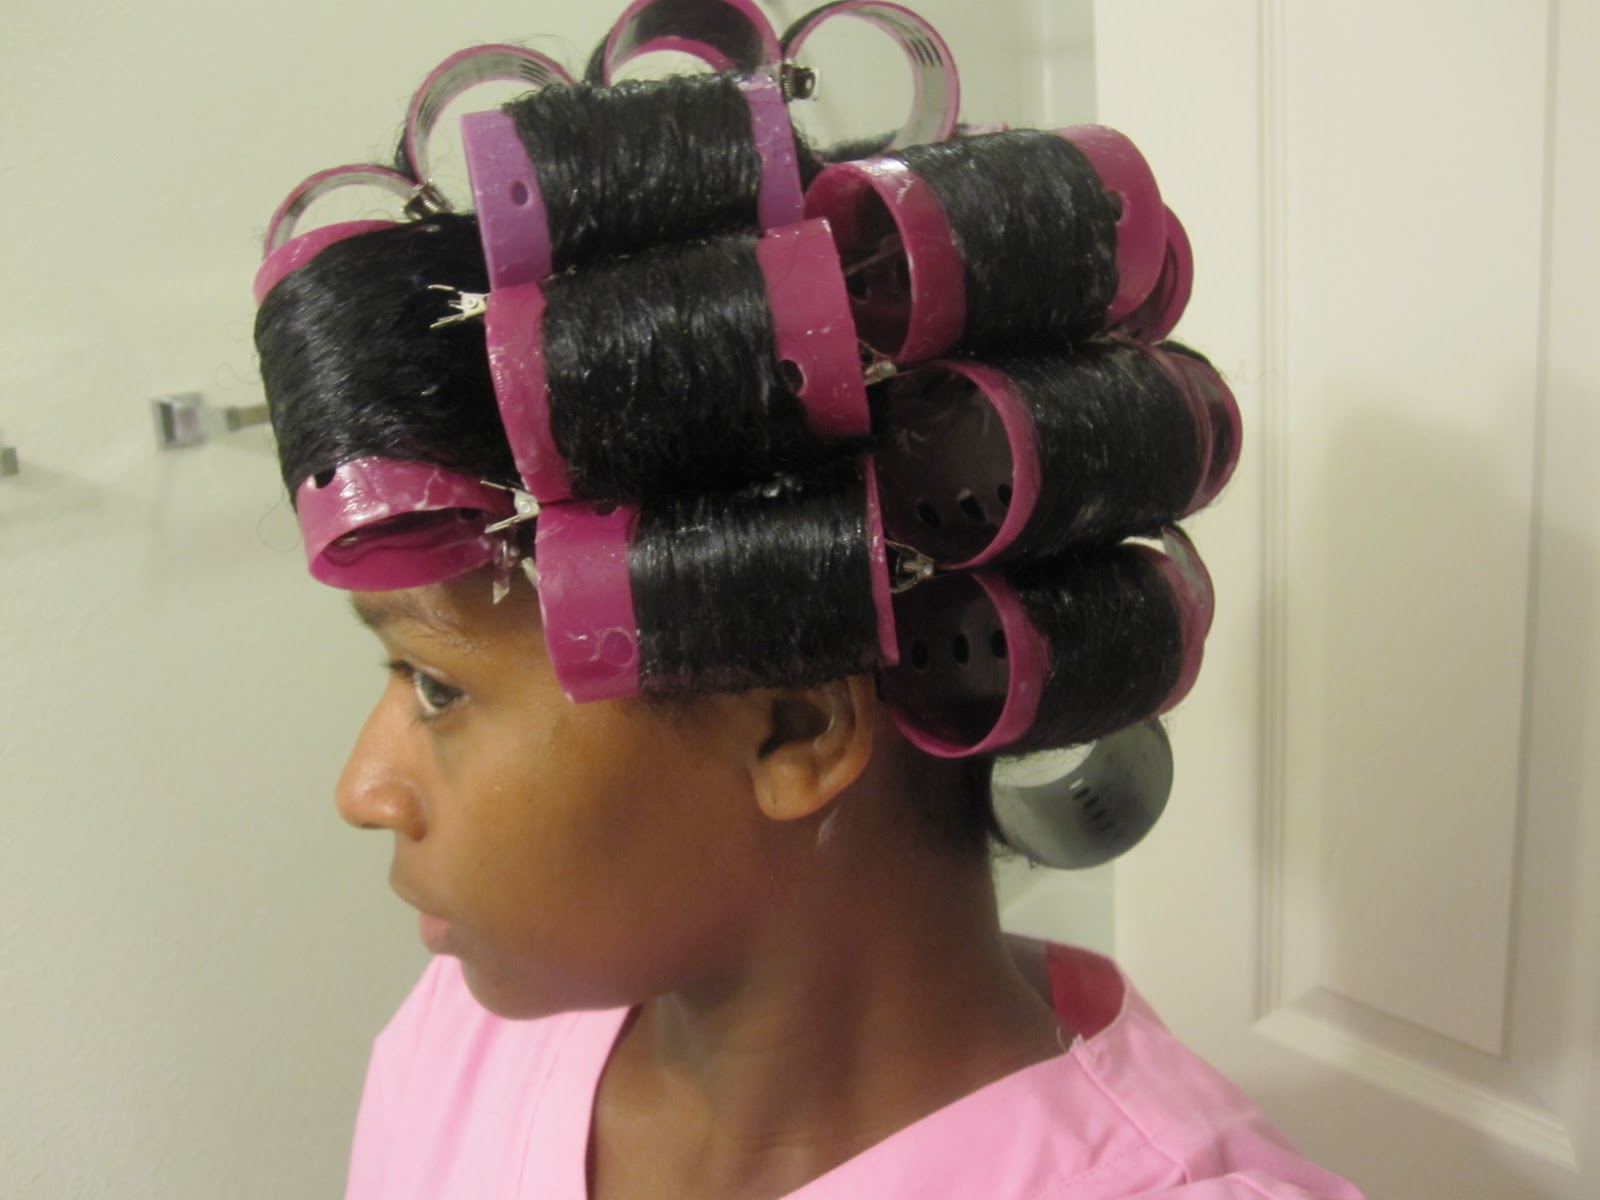
Remove the clips from your hair, you may notice that your feels a little dry. Take your spray bottle and fill it with water. Begin saturating your hair. After your hair is completely saturated, apply your leave in, foam wrap or styler of choice to your hair. Now, take the end of your rattail comb and make an off centered part on the left side of your hair going vertically to the nape of your neck. (The part should be a little off from the center). You should now have two parts. Gather the hair on the left side in your butterfly clip. Repeat the same step for the right side. There should be a total of 3 parts and the hair in the middle should resemble a mohawk. I will refer to this as the "mohawk"
STEP TWO:
Make a horizontal part in the front of the "mohawk". The part shouldn't be too thick nor too thin, it is kinda hard to explain, but you will know when you are actually rolling. It may take a couple of times to get it. This is going to be the first section that you roll. Pull this section of hair towards your chin as if your are doing a length check. Take your rattail comb and begin combing the hair from ends to roots. This is called smoothing, if your hair feels a little dry, be sure to spray it with water. Once your hair is smooth, begin rolling while smoothing the ends on the roller. As you are rolling your hair, lightly tug at the scalp ( LIGHTLY!) and roll it UPtowards the ceiling. Once the rolling is complete, secure the roller with a duckbill or metal clip at the roots. After you have added the second roller, you can secure it by clipping it on the first roller. (Just join both of the rollers together in the middle with the clips). You should feel a little tension, not too much, if so, it is too tight. You are going to repeat this step for the entire "mohawk" section.
STEP THREE:
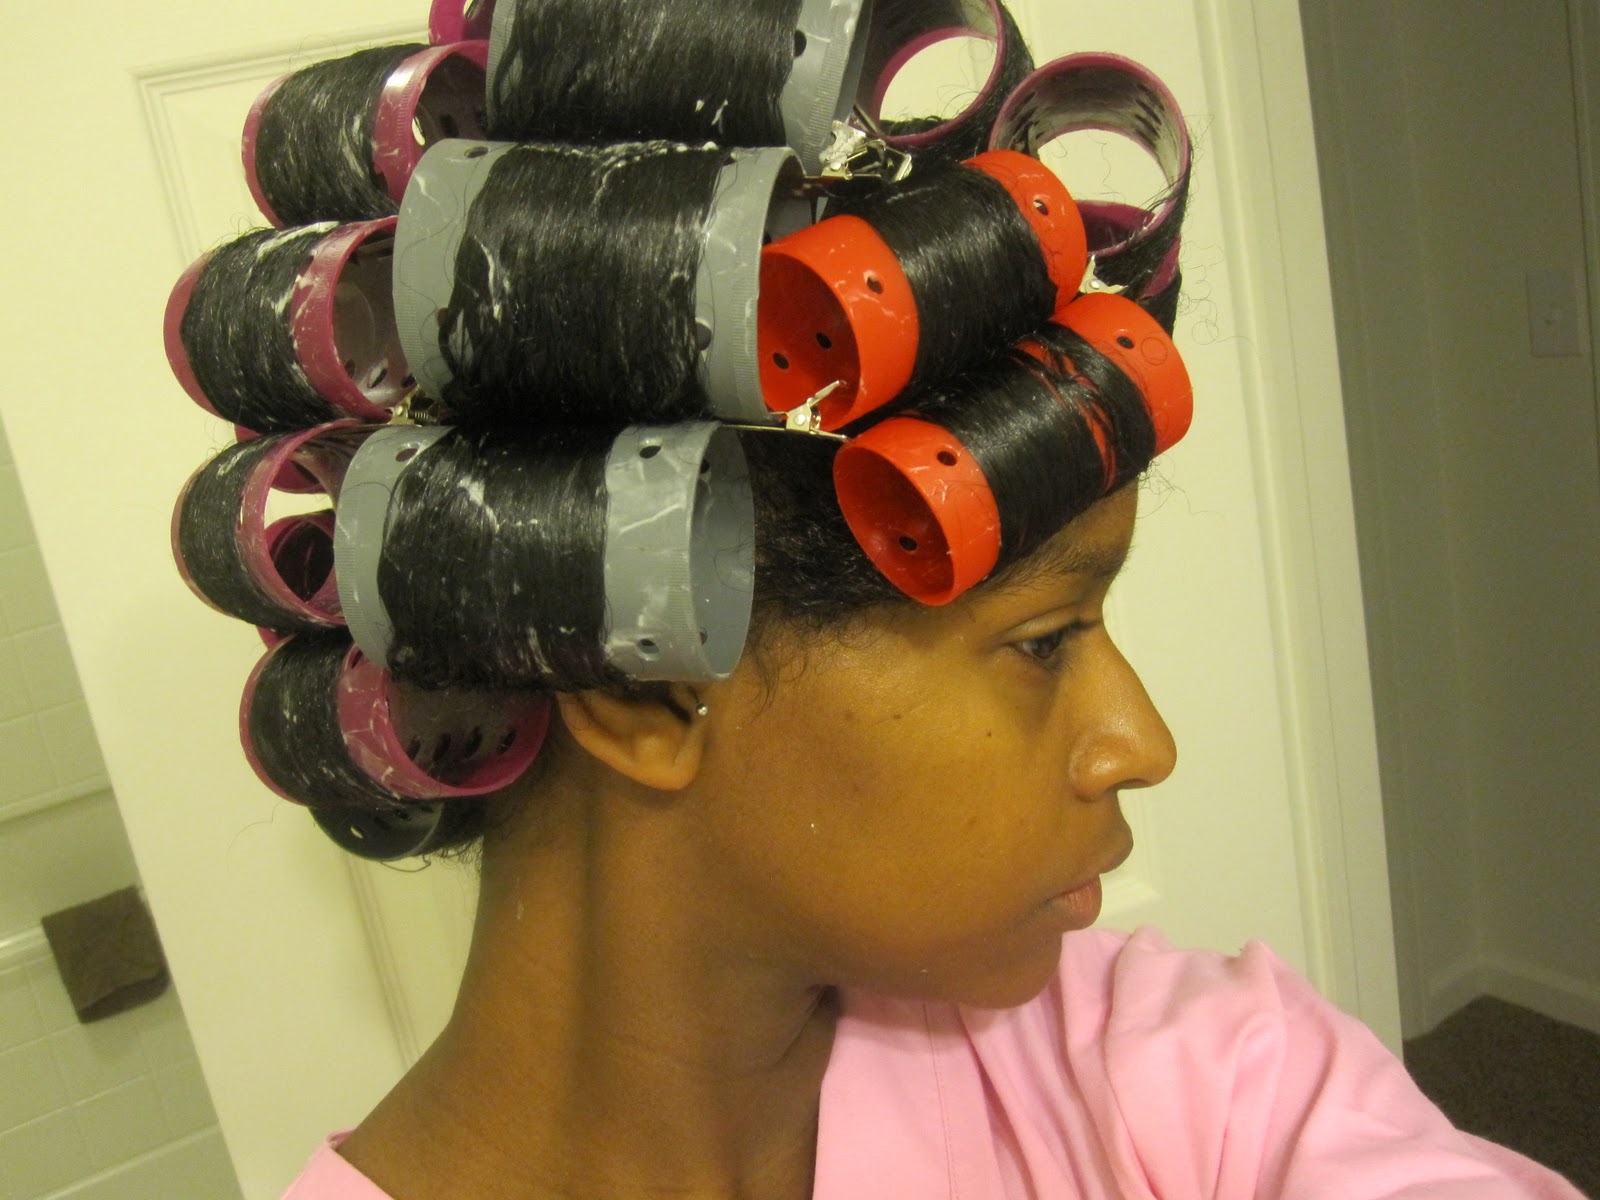
After the "mohawk" section is complete you can either start on the right or left side for the next section. Step three is similar to step two. This time make a vertical section towards the back of the left side. This will be the begining of your new section that you will set. Secure the hair that is exposed. Now, make a horizontal section at the top of the new section you just created. Take your rattail comb and smooth the hair. Grab your roller and roll your hair smoothing the ends towards the ceiling. Secure the roller. You are going to repeat these steps for the left and right sides of your head. Until you have completed the setting process.
STEP FOUR:
Drying- now you will sit under the dryer. Depending on your length and thickness, it can be between 1-2.5 hrs. I usually dry my hair on medium heat. Remember that you should not touch your hair. This is the annoying part, because the dryer can get pretty hot! Just remember to be patient. :)
STEP FIVE:
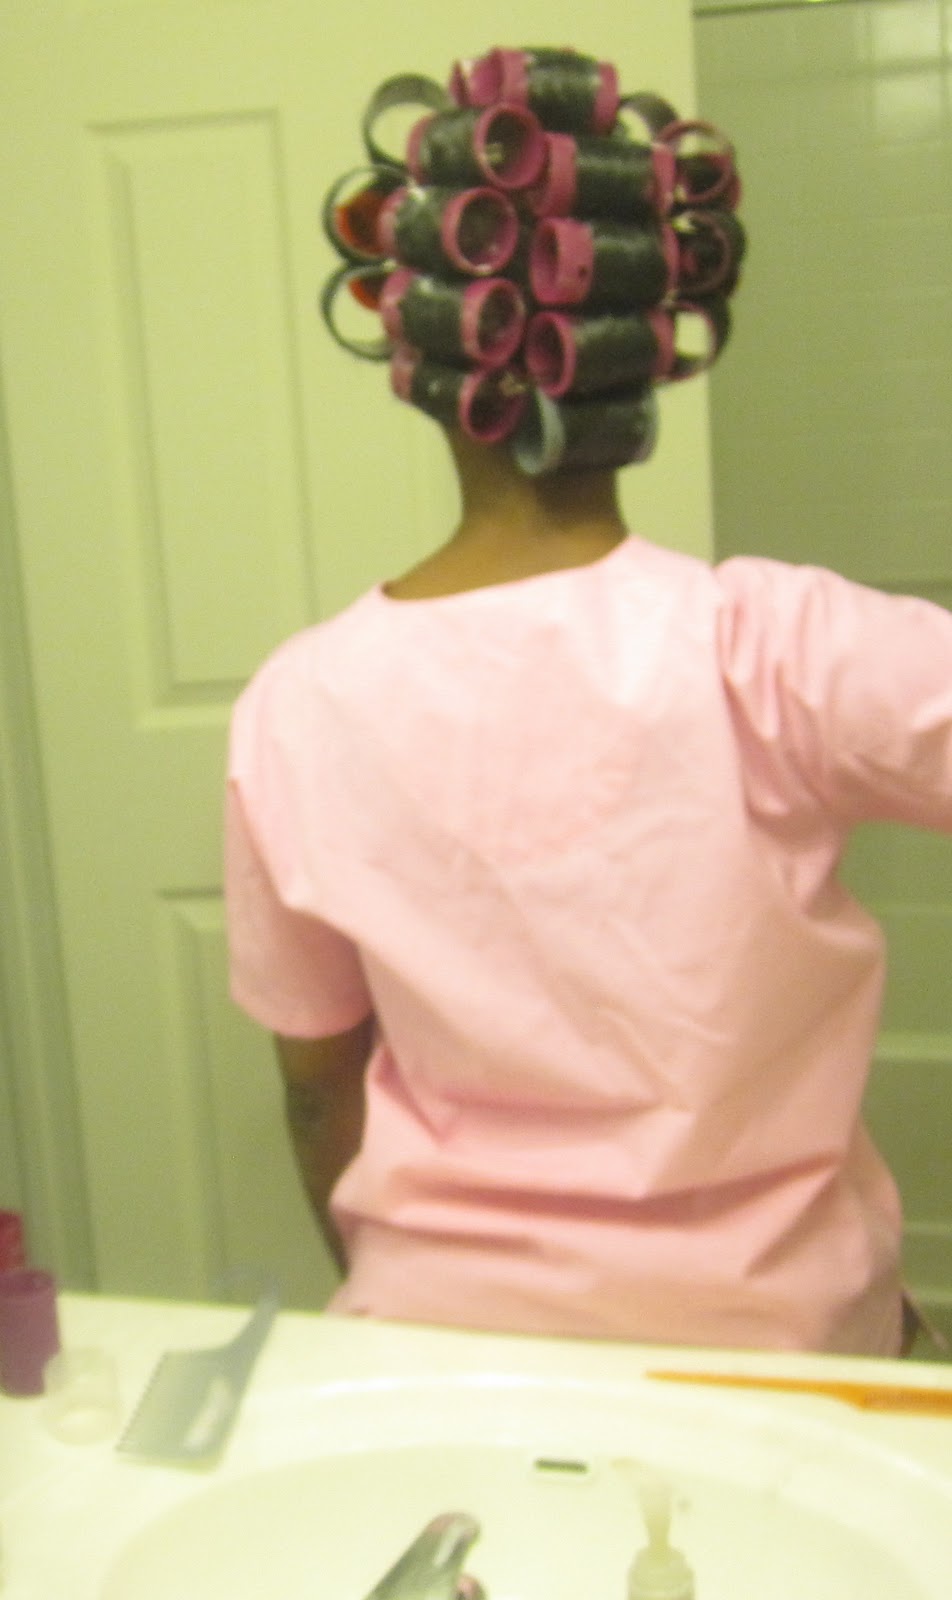
Removing the rollers- always check to see if your hair is completely dry before removing the rollers. I like to pull a roller from the middle and the very back. If the curls are dry, I know the rest of my hair is dry as well. Slowly remove the rollers, make sure you do not snag your hair on the metal clips. Trust me, it can and will happen if you're not careful. Slide the rollers out, it should creat a spiral effect. Once you are done doing that. Take a small amount of oil or heat protectant and fluff your curls lighlty without disturbing the curl pattern. It is hard to explain it in writing, but you will be smoothing your hair with your hands. The video will explain it better! Lol!
STEP SIX:
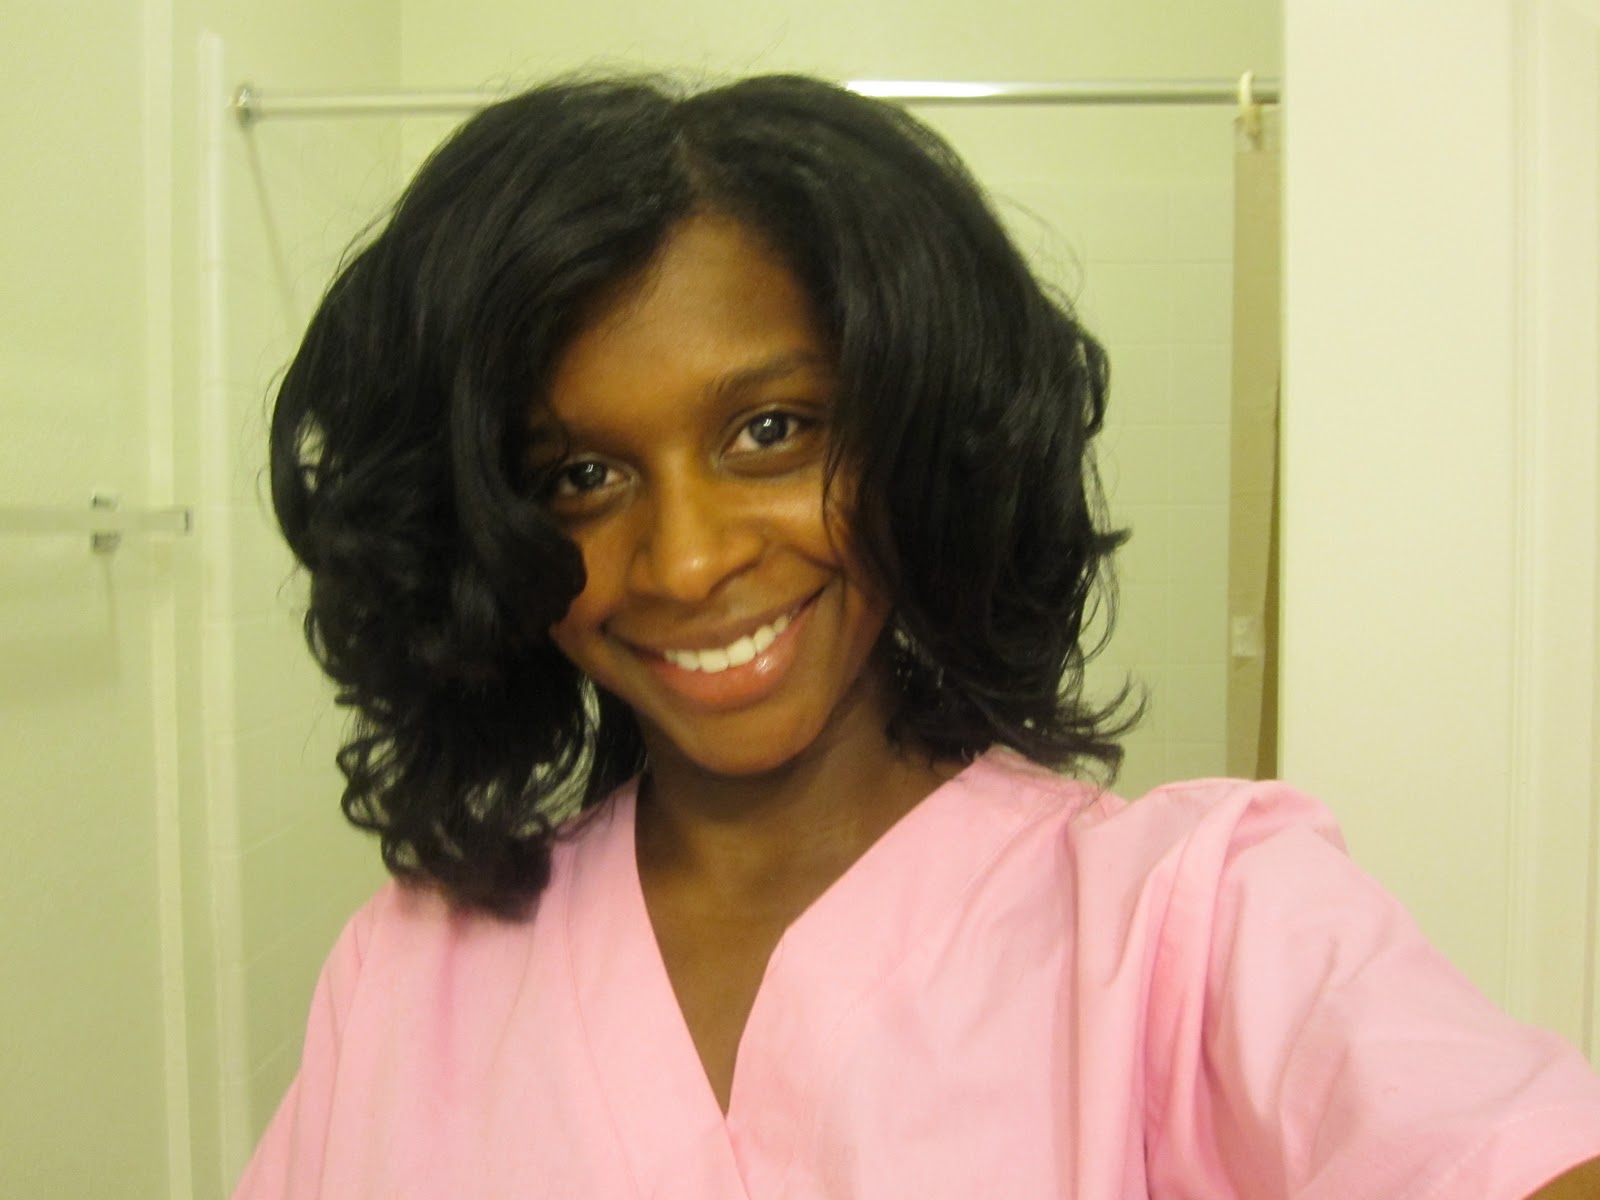
This is after I smoothed the roots with the curling iron on very low heat. I only did the roots.
*Even though I smoothed my roots, I still used a heat protectant.
You may notice that your roots are a little wavy, or even puffy (if you didnt put enough tension on the roots while you were rolling). Well, it is gonna wave a little. This time, I took my barrel irons and on low heat..it was VERY low, it "hit" the roots to smooth them a little. I just smoothed the roots only. You can also take the blow dryer on low heat and blow the roots. I know some people like to do that as well. It is your choice. If your roots are great, then you are good to go! This step is optional. My roots are still a little wavy. I do not mind though, I like the texture at the roots! You may have to trim your ends if needed. Enjoy your hair!
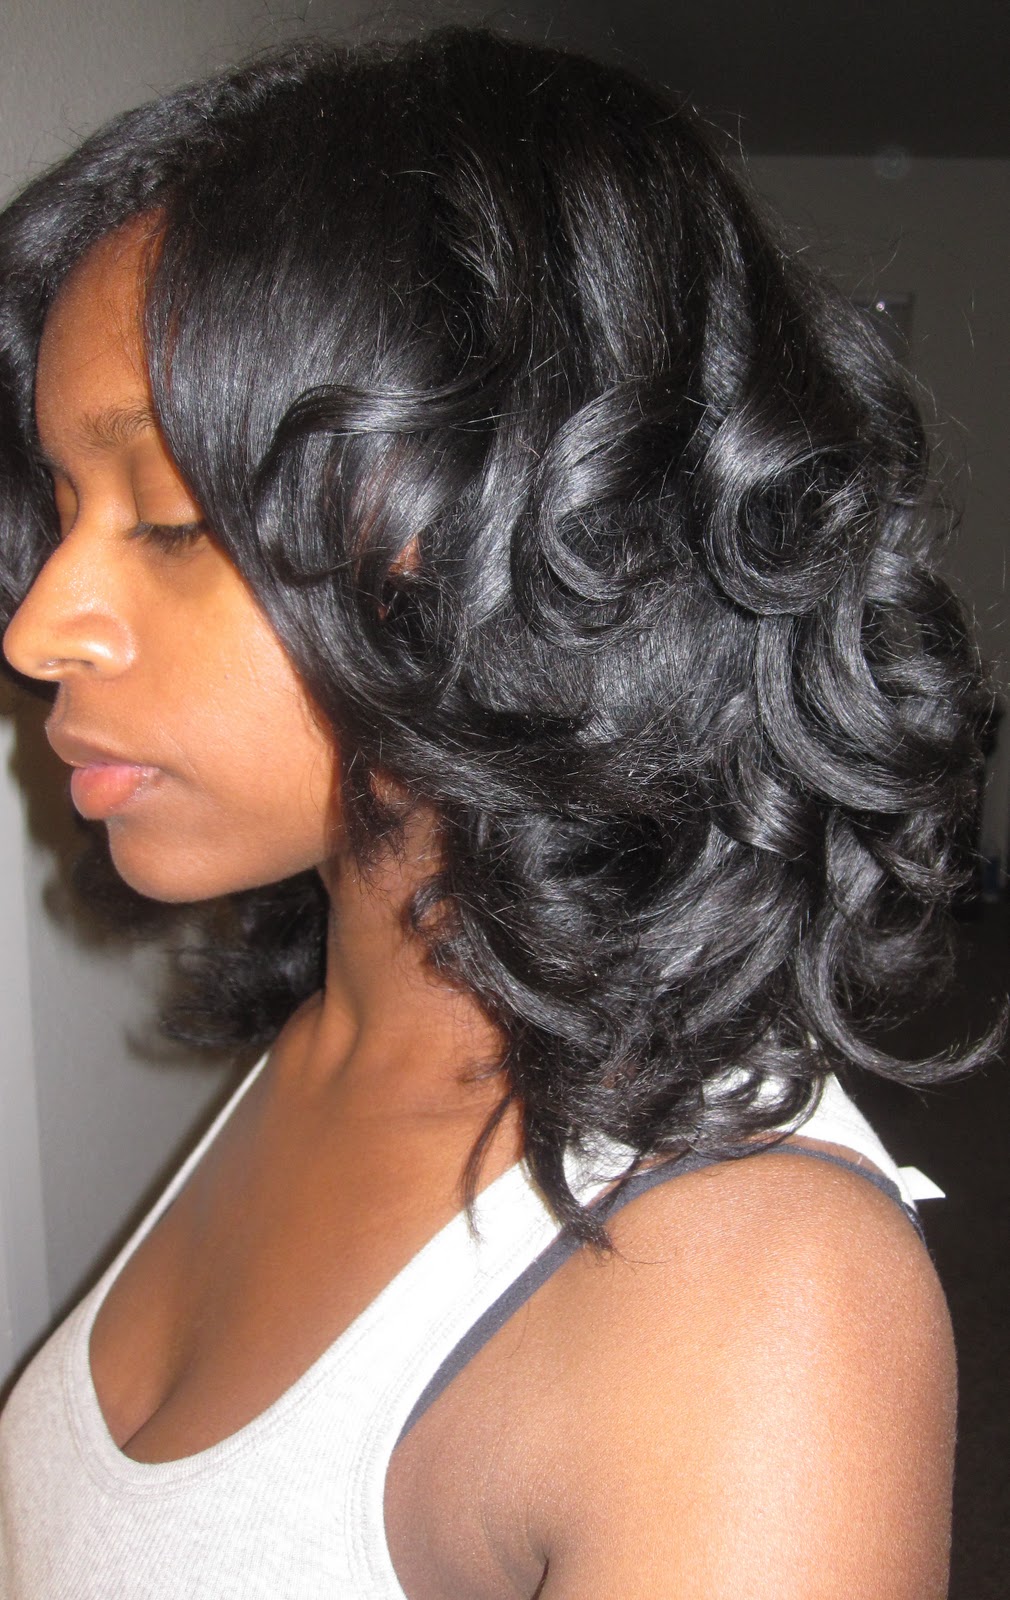
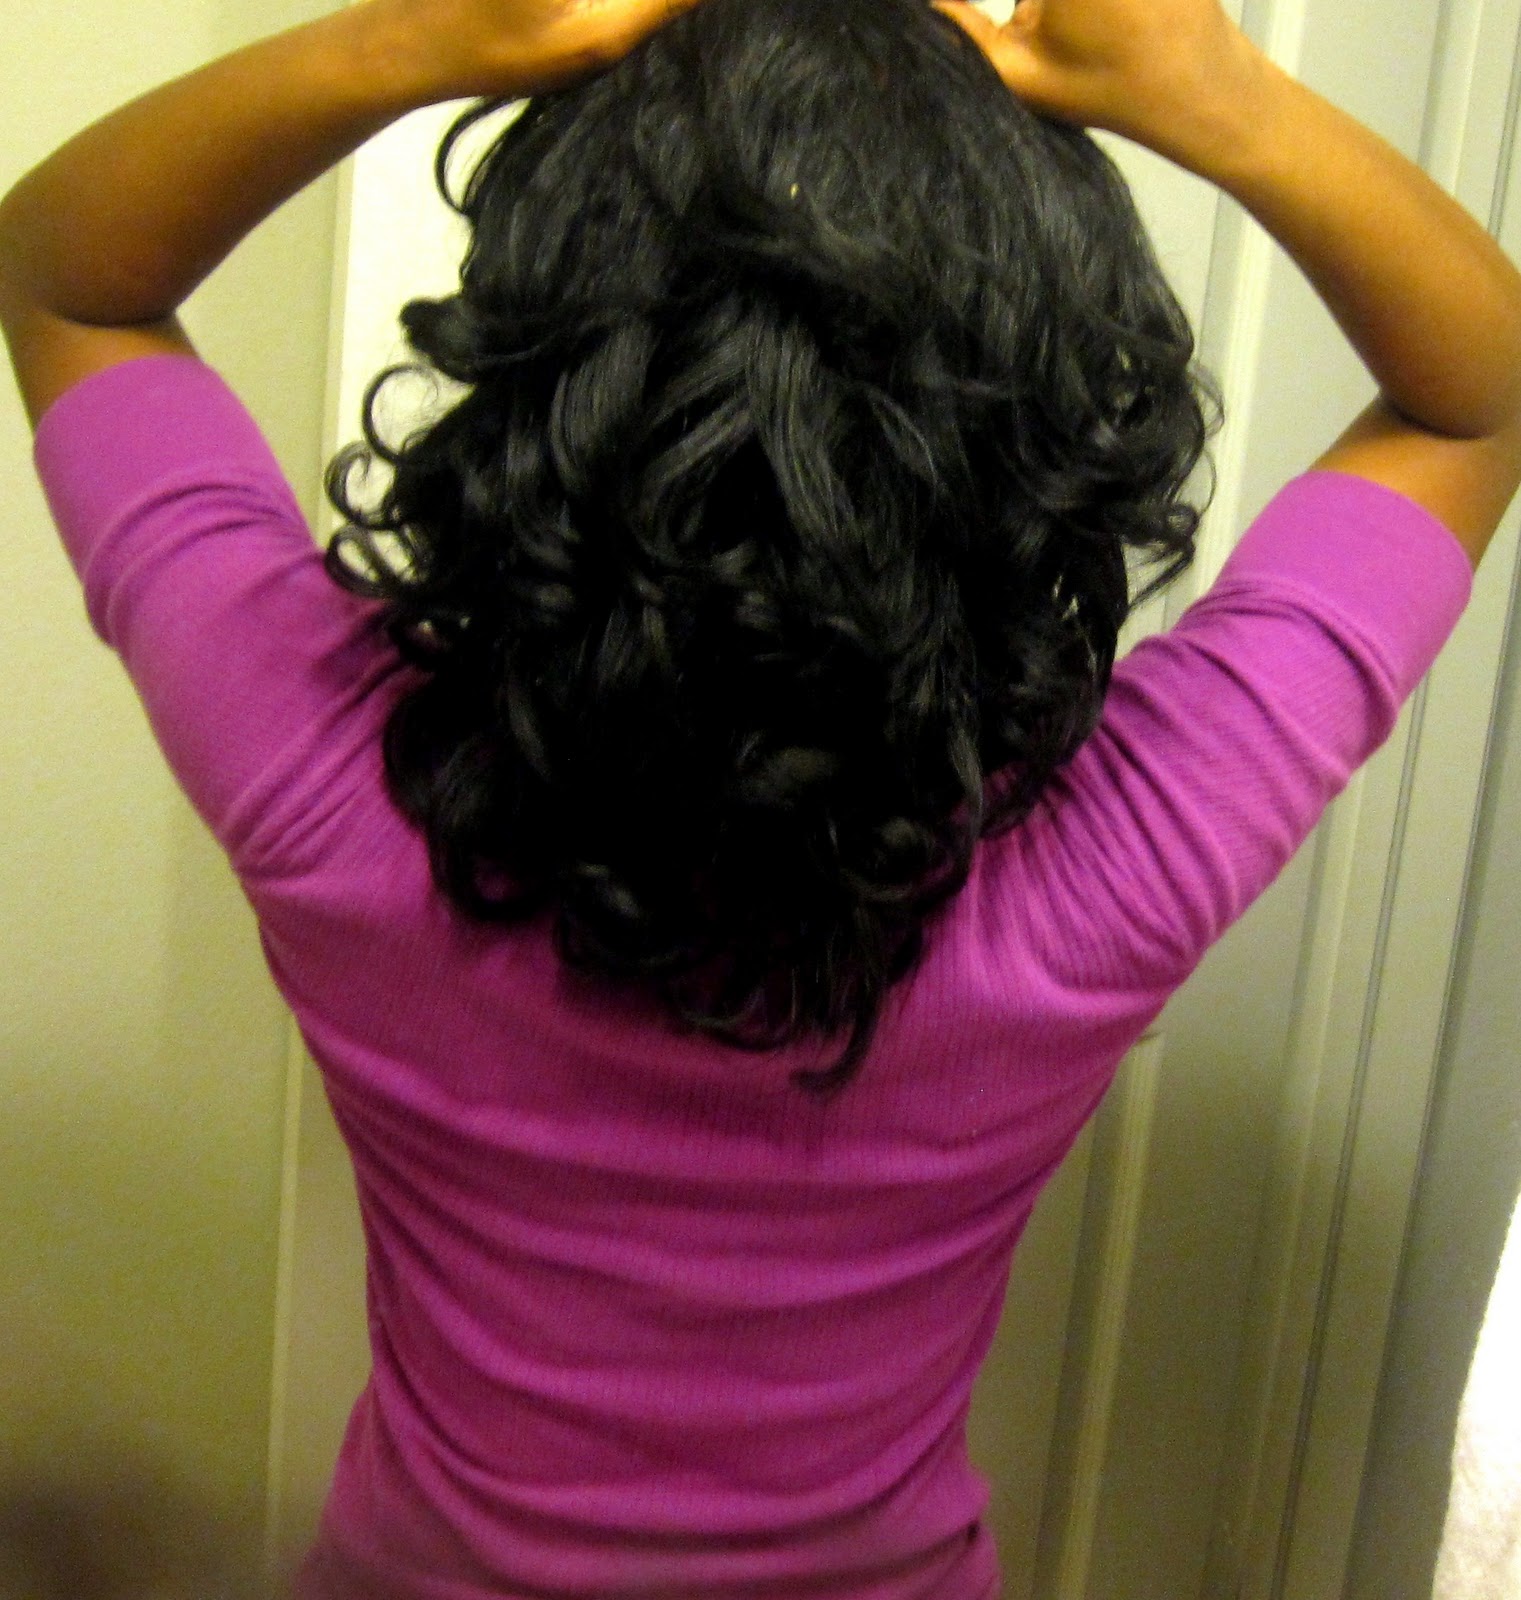
After a little "fluffing" and "curl positioning" with my fingers, I am good to go! You can see that the ends need a little dusting...
This was taken today after I trimmed a few of my ends...
Nightime Routine:
I like to pincurl my hair night, but you can also wrap it. Just make sure you sleep with a satin bonnet, or scarf to protect your hair. When you wake up, just remove your wrap or pincurls. That is it!
Check out my first roller setting video. It was recorded last February, I was 12 months post BC. A new video will be coming soon!
